👩🏫Composting Workshop in the Classroom
Transforming Waste into Life
Objective: Teach students how to turn food scraps into something super useful for plants while learning about nature and recycling. Let's transform waste into fertile soil!
Materials:
Plastic bottles, plastic bins, or a large composter (depending on space and student level)
“Green” waste (fruit and vegetable scraps) and “brown” waste (dry leaves, cardboard)
Compost thermometer or P-Bit / Smart Citizen to measure temperature and humidity (if available)
Gloves and aprons
Magnifying glasses for investigation (if available)
Step 1: What is Compost? Time to Introduce It!
Start by explaining what compost is and why it’s so amazing. Use information from this e-book to create a presentation. Here's a video from the UN about composting in Vietnam.
Adapt your message based on the group:
For younger students: Explain that we’re turning peels and food scraps into rich soil for plants, like magic!
For older students: Discuss the role of bacteria and fungi and how compost helps recycle nutrients.
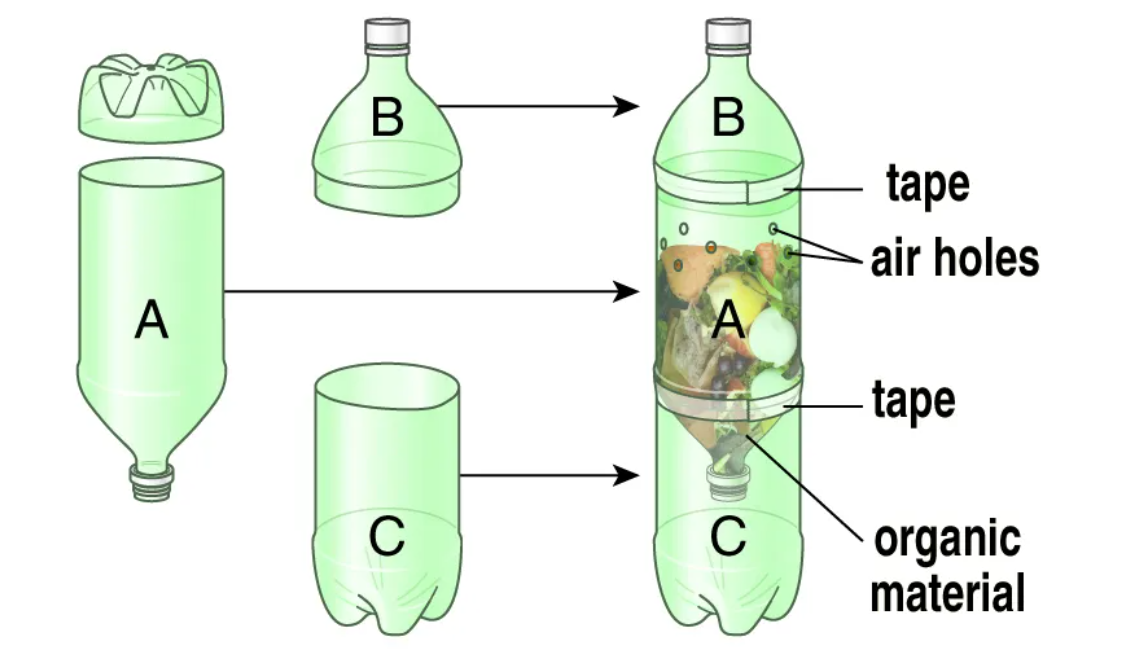
Set up a composting space: Use recycled water bottles for small spaces, plastic bins for indoor areas, or a large composter if you have more room.
Step 2: Collect and Sort Waste
Invite students to collect scraps from home or ask the cafeteria to save some waste for the workshop.
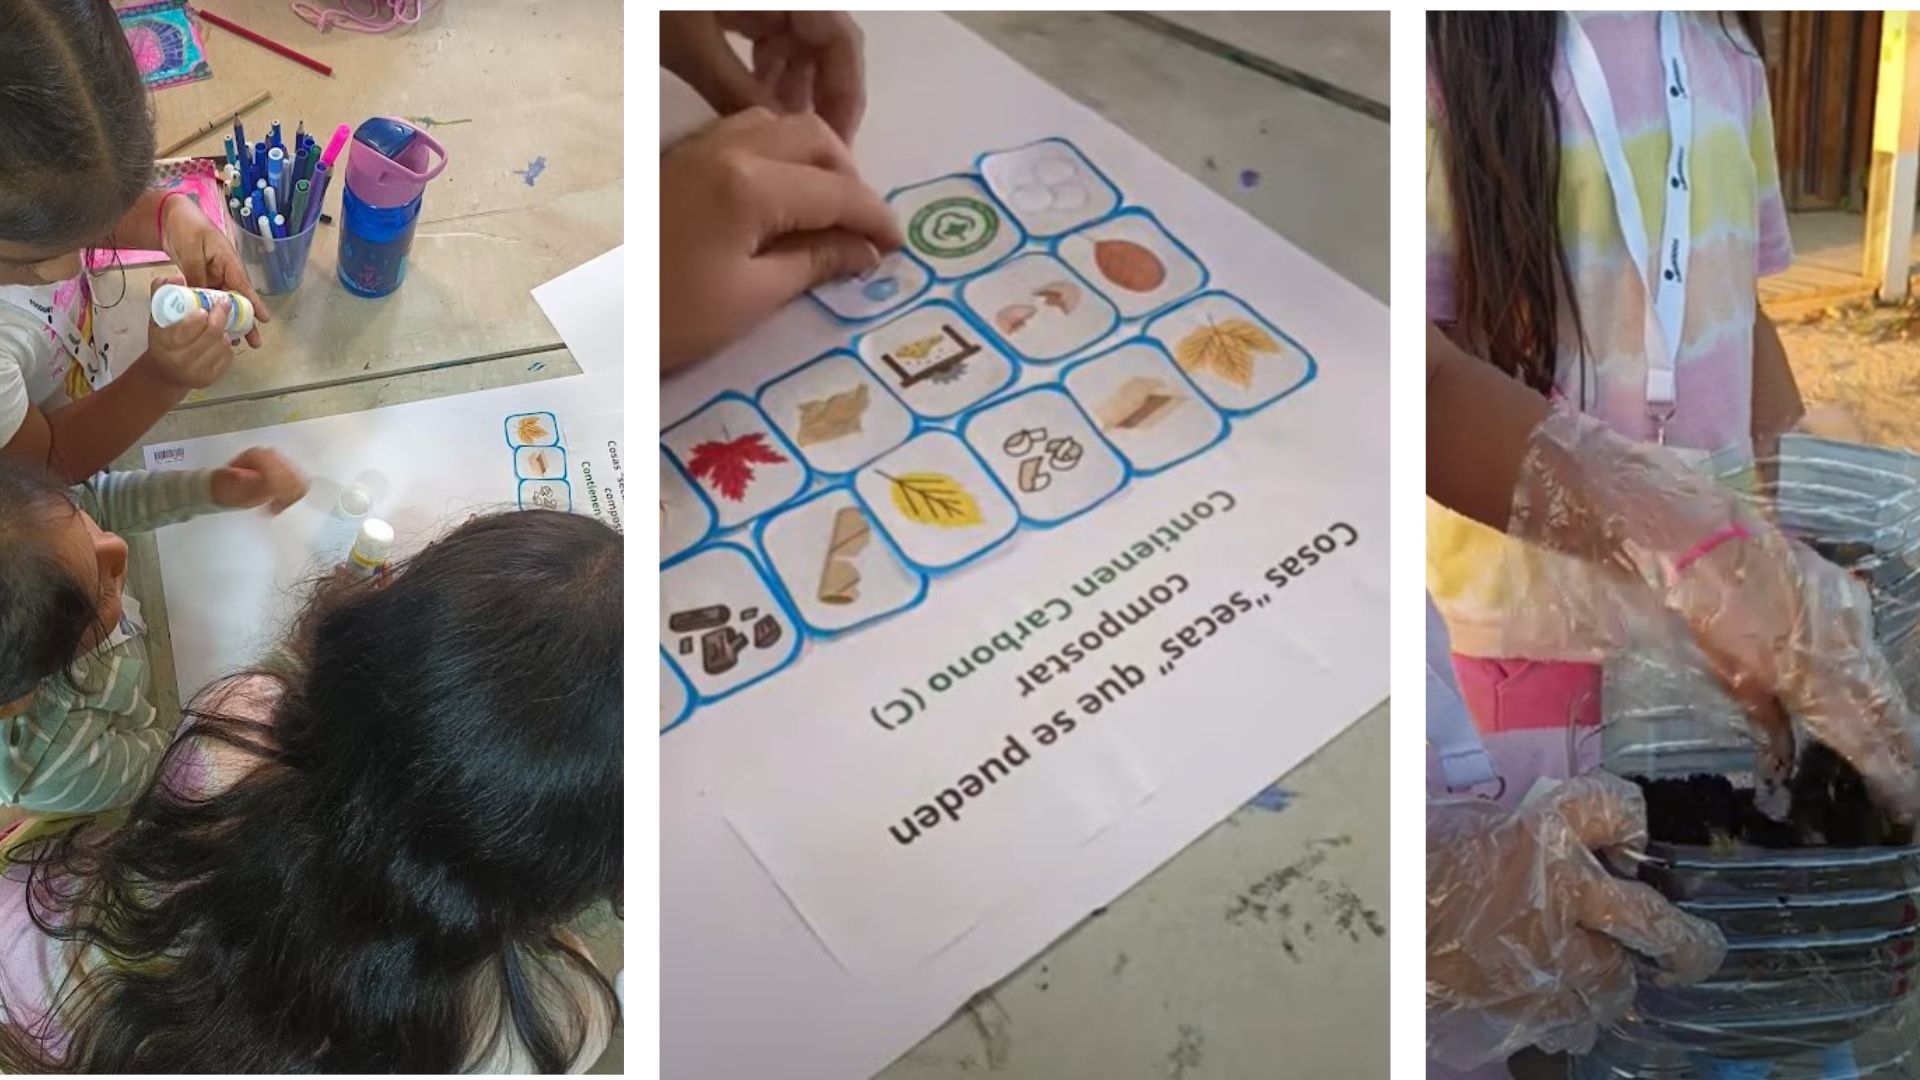
Play a sorting game to separate the waste into “greens” (fruit and vegetable scraps) and “browns” (dry leaves, paper). This helps them learn what can be composted and makes sorting fun!
Step 3: Hands-On with the Composter!
With gloves on, have the students add layers of “greens” and “browns” to their composter. It’s like making a layered cake! Explain that this balanced mix is essential for the process to work well.
For secondary or high school students: If you have access to tools like 3D printers, why not design a custom composter? It’s a perfect mix of technology and ecology!

Step 4: Observe and Monitor – Science Begins!
Depending on the level:
Primary students: Observe the compost weekly to see changes in color, smell, and texture. It’s like watching something cook over time!
Secondary and high school students: Use a thermometer or P-Bit to measure temperature and humidity. Students can record data to observe how the compost heats up thanks to microorganisms.
For advanced students: Discuss "inoculants" and create a special mixture with waste, water, and molasses to speed up composting.
Step 5: Investigate the Compost Organisms
Using magnifying glasses, invite students to explore the “inhabitants” of the compost: tiny worms and other critters that help the process. Explain that these microorganisms break down organic matter and are the “invisible heroes” of composting.
For older students: Explore the different types of bacteria and fungi involved in each stage of the process.
Step 6: Time to Use the Compost!
Once the compost is ready, it’s time to use it! Apply the compost to classroom plants, the school garden, or a special pot everyone can care for.
Creative activity: If you used plastic bottles as composters, the part collecting leachate (the liquid produced during composting) can be transformed into a planter! Decorate the bottom section with paint, ribbons, or drawings. Add soil and the compost to plant something special. This way, students can see how waste turns into a full cycle of life—from scraps to new plants.
Reflection question: Where else could we use compost? This opens up ideas for using it at home, in parks, or in community gardens, making composting both practical and beautiful!
Step 7: Reflect and Share What You Learned
Each week, spend a few minutes letting students share their observations. They can draw or write in a journal about what they’ve noticed in the compost. They could even create a mural to inspire others!
At the end, hold an exhibit showcasing the finished compost and what they’ve learned. Let the students teach other classmates or even their families. They’ll love being the composting experts!
Last updated
